 Save to Pinterest
 There's something magical about the smell of butter and sugar creaming together on a quiet afternoon. Years ago, my grandmother would let me stand on a wooden stool in her kitchen while she made these cookies, and I'd watch the mixer transform simple ingredients into something that looked and felt like silk. She never measured with a scale—just her eyes and her hands—but somehow they'd come out perfect every time, with that exact tender crumb that melts on your tongue. Now when I bake them, I'm right back there, and my own kids are the ones pressing their noses against the mixer bowl.
I learned to really appreciate these cookies the December my sister came home unexpectedly with her new partner. I didn't have time to plan anything fancy, so I pulled this dough from the freezer—it was from a batch I'd made weeks before—rolled it out at midnight, and we decorated them together while listening to old music and laughing about nothing in particular. They turned out better than if I'd stressed over it all day, and now whenever I make them, that moment of last-minute togetherness is part of the recipe.
Ingredients
- Unsalted butter, softened (1 cup): Use room-temperature butter so it creams into the sugar without lumps—cold butter won't incorporate properly and you'll end up with dense cookies instead of tender ones.
- Granulated sugar (1 cup): This is what gives the cookies their slight structure and those delicate crispy edges; don't substitute brown sugar or your texture will be completely different.
- Large egg (1): This binds everything together and adds richness without making the dough cake-like, so use a fresh egg at room temperature for best results.
- Pure vanilla extract (1½ teaspoons): The real stuff makes all the difference in how these taste—imitation won't give you that depth of flavor that makes people ask what your secret is.
- All-purpose flour (2¾ cups): Don't pack it down when you measure, or you'll end up with too much flour and cookies that taste dry and crumbly instead of tender.
- Baking powder (½ teaspoon): This gives them just enough lift to be tender rather than dense, but only a little—too much and they'll taste metallic.
- Salt (½ teaspoon): A small amount actually makes the butter and vanilla taste more pronounced, so don't skip it even though you can't taste salt in the finished cookie.
- Additional flour for rolling: Have this ready on your counter because the dough gets sticky as you work with it, and a light dusting helps without toughening the cookies.
- Royal icing or decorations (optional): If you're going for decorated cookies, royal icing gives the most professional finish, but colored sugars work beautifully too and require zero extra steps.
Tired of Takeout? 🥡
Get 10 meals you can make faster than delivery arrives. Seriously.
One email. No spam. Unsubscribe anytime.
Instructions
- Cream the butter and sugar:
- Beat the softened butter and sugar together until it looks pale and fluffy, like frosting—this usually takes about 2 to 3 minutes with an electric mixer. This step is where the cookies get their tender texture, so don't rush it or skip ahead.
- Add the egg and vanilla:
- Beat them in until you don't see streaks of egg anymore. The mixture should look smooth and slightly lightened, like you've just added air to it.
- Mix the dry ingredients separately:
- Whisk the flour, baking powder, and salt together in another bowl so the leavening is distributed evenly. This matters more than you'd think—uneven baking powder leads to some cookies rising more than others.
- Combine wet and dry:
- Add the dry mixture to the wet mixture a little at a time, stirring gently until just combined. Stop as soon as you don't see dry streaks anymore; overmixing develops gluten and makes the cookies tough instead of tender.
- Chill the dough:
- Divide it in half, flatten each half into a disk, wrap it up, and refrigerate for at least an hour. Cold dough is easier to roll out and less likely to spread all over the baking sheet, which means cleaner cookie shapes.
- Preheat and prepare:
- Set your oven to 350°F (175°C) and line your baking sheets with parchment paper while the oven heats. Parchment is worth using because it prevents the bottoms from browning too much.
- Roll and cut:
- On a lightly floured surface, roll one disk of dough to about ¼-inch thick—a thickness between a coin and a pencil—and cut out shapes with your favorite cookie cutters. If the dough gets warm and sticky while you're working, pop it back in the fridge for a few minutes.
- Space them on the sheet:
- Leave about an inch between cookies so they have room to spread slightly without touching. A little spreading is normal and desirable; it's what gives them that tender texture.
- Bake until edges set:
- Bake for 8 to 10 minutes, watching until the edges are just barely starting to turn golden while the centers still look pale. This is the sweet spot—they'll look slightly underbaked when you pull them out, but they'll continue cooking on the hot sheet.
- Cool in stages:
- Let them sit on the baking sheet for 5 minutes so they set up just enough to move, then transfer them to a wire rack to cool completely. Cooling completely is important if you want to decorate them, because decorations won't stick to warm cookies.
- Decorate as you like:
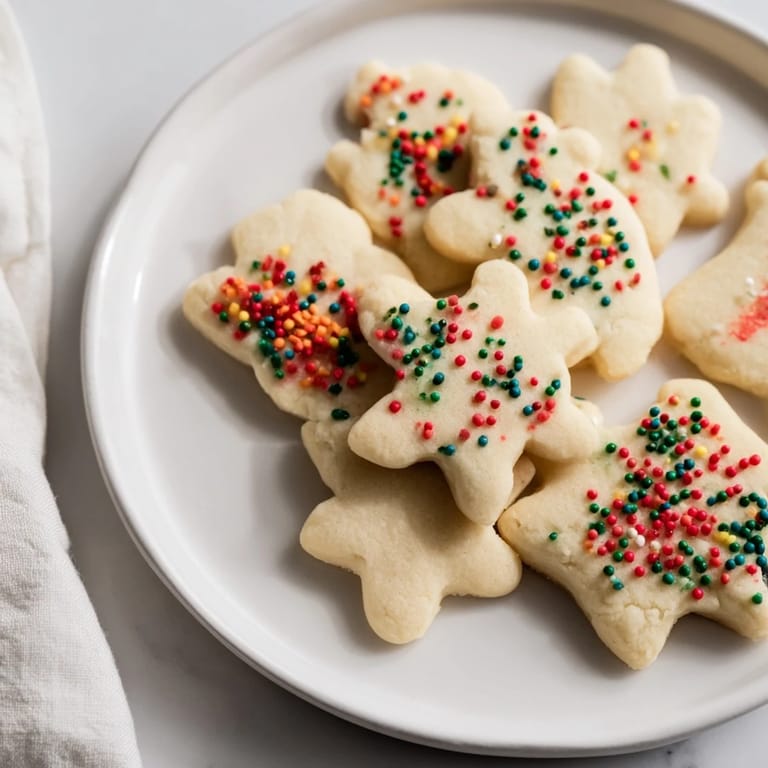
- Royal icing creates a professional look, colored sugars add sparkle, or sprinkles make them festive—the choice depends on your mood and how much time you want to spend.
 Save to Pinterest
 One year my six-year-old nephew insisted on helping make these, and he got frosting everywhere—on his face, in his hair, somehow on the ceiling—but his hands moving over those cookies with such pride and concentration made me realize that these aren't just cookies. They're the thing that gives us an excuse to slow down together.
The Texture You're Aiming For
The magic of these cookies is in understanding that tender doesn't mean underbaked. I used to pull mine out as soon as the edges looked done, thinking I was being careful, but they'd come out a little too soft and almost cakey. The trick is to let them bake just until the edges turn a pale golden color while the centers still look slightly underbaked—they'll firm up as they cool on the pan and then finish setting on the wire rack. This three-stage cooling is what gives you that perfect texture: crisp enough at the edges to hold up to decorating, but still soft and buttery in the center.
Make-Ahead Magic
The real genius of this recipe is how flexible it is with timing. I started making the dough days in advance when I realized that the hardest part of holiday baking wasn't the decorating—it was finding the mental energy to do everything at once. Now I keep a roll of dough in my freezer almost year-round, and whenever I want fresh cookies with minimal effort, I pull out what I need, roll it out, and bake. The dough keeps for three days in the fridge and up to two months frozen, which means you can spread out the work and actually enjoy the process instead of pulling an all-nighter.
Flavor Variations That Actually Work
After a while, plain sugar cookies start to feel predictable, so I've played around with different additions to keep things interesting. Lemon zest brings brightness and reminds me of spring baking, while almond extract adds a sophisticated subtle flavor that people always ask about but can never quite identify. The key is adding these extras to the butter and sugar before you mix in the dry ingredients, so they disperse evenly throughout the dough.
- Try ½ teaspoon of almond extract for an unexpectedly grown-up version that pairs beautifully with royal icing.
- Add the zest of one lemon to the butter and sugar for a version that tastes fresh and summery even in the middle of winter.
- A tiny pinch of cinnamon or nutmeg in the flour mixture adds warmth without screaming spice.
 Save to Pinterest
 These cookies have been part of my kitchen for so long that I can make them half-asleep on a December morning, and they turn out the same every time. That's the kind of recipe worth keeping around.
Recipe Help Center
- → What causes sugar cutouts to be tender rather than hard?
The tenderness comes from the right balance of softened butter and sugar combined with proper chilling of dough, which controls gluten development and texture.
- → How can I prevent cookies from spreading too much?
Chilling the dough before rolling slows spreading. Using flour for rolling and baking at 350°F helps maintain shape.
- → What decorations work best for these cookies?
Royal icing, colored sugars, and sprinkles add color and texture, complementing the buttery base without overpowering.
- → How to achieve crispier versus softer cutouts?
Bake a minute longer for crispier edges; remove as soon as edges set for a softer center.
- → Can I add flavors without affecting texture?
Yes, small amounts of almond extract or lemon zest enhance flavor without changing dough consistency.