 Save to Pinterest
 My sister called me in a panic the night before her book club meeting, asking if I could whip up something that would make everyone forget their diets for one evening. I had peanut butter cups sitting in my pantry and a craving for brownies, so I decided to combine them into one decadent square. The moment she bit into one at that gathering, the room went silent—then erupted. That's when I knew this recipe had staying power.
I've made these for potlucks where people literally took two before anyone else got a chance, and for quiet Sunday afternoons when my partner and I needed something to justify sitting on the couch with coffee. They've become my go-to when I want to impress without spending hours in the kitchen, which honestly feels like a small miracle.
Ingredients
- All-purpose flour: Use 1 cup (125 g) measured by the spoon-and-level method to avoid packing it down, which can make brownies dense.
- Unsweetened cocoa powder: That 1 cup (80 g) is non-negotiable for real chocolate flavor—don't reach for the sweetened kind or you'll end up with candy.
- Baking powder: Just 1/2 teaspoon keeps these from being hockey pucks while maintaining that fudgy texture.
- Salt: 1/2 teaspoon amplifies the chocolate and balances the sweetness in ways you won't consciously notice but absolutely will miss if it's absent.
- Unsalted butter: Melt 1 cup (225 g) completely so it blends smoothly with the sugar and creates that glossy, rich base.
- Granulated sugar: The 2 cups (400 g) dissolves into the butter to create that signature brownie sheen and moisture.
- Large eggs: Add all 4 eggs one at a time, whisking well after each, because this helps emulsify everything into a smooth batter.
- Vanilla extract: Just 2 teaspoons adds depth without making these taste like a vanilla cake.
- Semi-sweet chocolate chips: Fold in 1 cup (175 g) gently to distribute them evenly without deflating your batter.
- Mini peanut butter cups: Use 16 mini ones (or 8 standard halved) arranged in a single layer so every square gets one.
Tired of Takeout? 🥡
Get 10 meals you can make faster than delivery arrives. Seriously.
One email. No spam. Unsubscribe anytime.
Instructions
- Get your pan ready:
- Preheat the oven to 350°F (175°C) and line a 9x13-inch pan with parchment paper, leaving some overhang on the sides so you can lift the whole thing out later without wrestling with a spatula. This small step saves you from scraping chocolate off your pan for twenty minutes.
- Mix the dry team:
- Whisk together the flour, cocoa powder, baking powder, and salt in a medium bowl until the cocoa powder is completely broken up and distributed. You'll see the mixture transform into an even, deep brown color.
- Cream the butter and sugar:
- In a large bowl, combine the melted butter and sugar, whisking until the mixture looks glossy and slightly thick. This shouldn't take long—you're aiming for a texture that looks almost mousse-like.
- Build the batter:
- Add the eggs one at a time, whisking well after each addition so they fully incorporate, then stir in the vanilla extract. If you dump all the eggs in at once, you risk ending up with a separated, grainy mess.
- Fold everything together:
- Gradually fold the dry ingredients into the wet mixture using a spatula, stirring until just combined—overmixing develops gluten and makes brownies tough. Stop as soon as you don't see streaks of flour anymore.
- Add the chocolate:
- Gently fold in the chocolate chips, distributing them throughout the batter. This is your last chance to keep the batter airy, so use a light hand.
- Layer the base:
- Spread exactly half of the brownie batter evenly into the prepared pan, using your spatula to smooth it into the corners. Take a breath here—precision matters for even baking.
- Place the peanut butter cups:
- Arrange the mini peanut butter cups evenly across the batter in rows, spacing them so each brownie square will have one in the center. They'll sink slightly as the batter bakes, which is exactly what you want.
- Cover with the second layer:
- Spoon the remaining batter over the peanut butter cups, then smooth the top gently with a spatula to cover them completely. A few chocolate chips peeking through look rustic and inviting.
- Bake until perfect:
- Bake for 28–32 minutes, checking at the lower end of the time range by inserting a toothpick into the center—it should come out with a few moist crumbs clinging to it, not completely clean. If it comes out dry, you've gone too far.
- Cool completely:
- Let the brownies cool in the pan on a wire rack, which takes about an hour but is worth every minute of patience. Cutting into warm brownies results in crumbles; cutting into cooled ones gives you clean, beautiful squares.
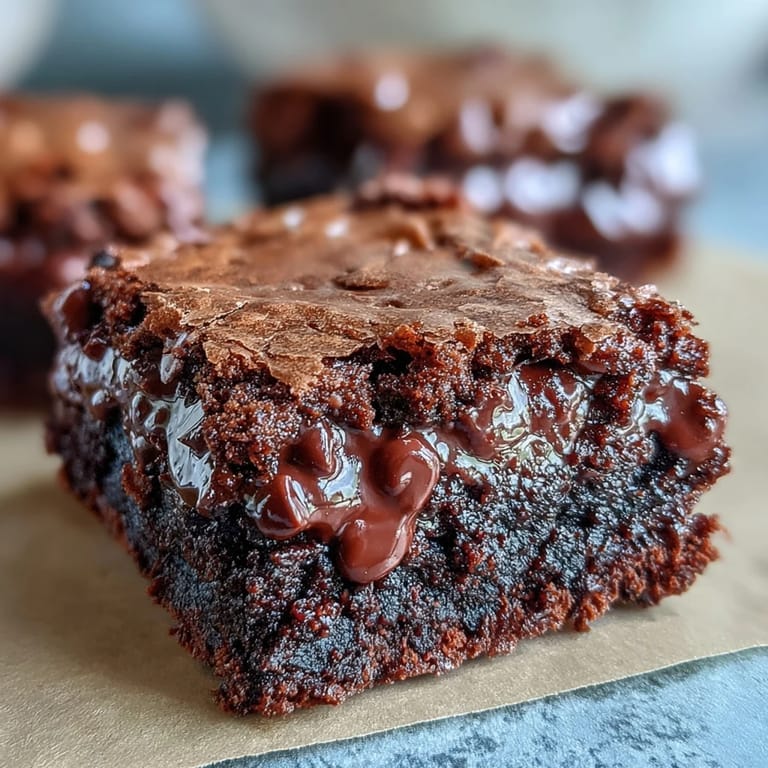 Save to Pinterest
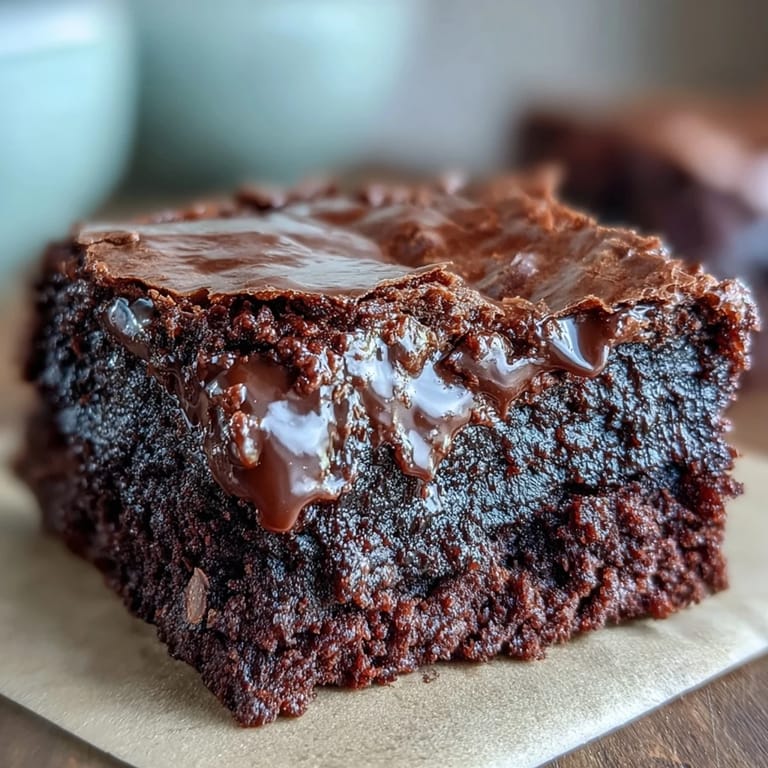
 There's something magical about slicing into cooled brownies and seeing that peanut butter cup revealed in the center of each square, still slightly soft from the bake. It feels like you've created something that goes beyond dessert—it's a small edible celebration.
Storage and Make-Ahead Magic
These brownies keep for up to five days in an airtight container at room temperature, which means you can bake them on a quiet weeknight and have an emergency dessert waiting all week. I've also wrapped individual squares in parchment paper and frozen them for up to three months, then thawed them at room temperature whenever a craving struck.
When to Serve These
I bring these to potlucks because they travel beautifully and people actually eat them instead of just admiring them. They're also perfect for gift-giving when you box them up nicely, though I've learned that homemade desserts disappear faster than you'd expect.
Flavor Variations Worth Trying
Once you nail the basic recipe, the real fun begins with swaps and additions. I've drizzled melted white chocolate over the cooled brownies, swapped caramel candies for the peanut butter cups on a whim, and even stirred a tablespoon of espresso powder into the cocoa mixture for a grown-up twist that my coffee-loving friends couldn't stop talking about.
- Serve warm brownies with vanilla ice cream and a drizzle of chocolate sauce for dessert that feels restaurant-quality but came from your own oven.
- Dust the finished squares with sea salt flakes to amplify the chocolate and peanut butter contrast in unexpected ways.
- Make brownie sundaes by crumbling a slightly warm brownie into a bowl and layering it with ice cream, whipped cream, and crushed peanut butter cups.
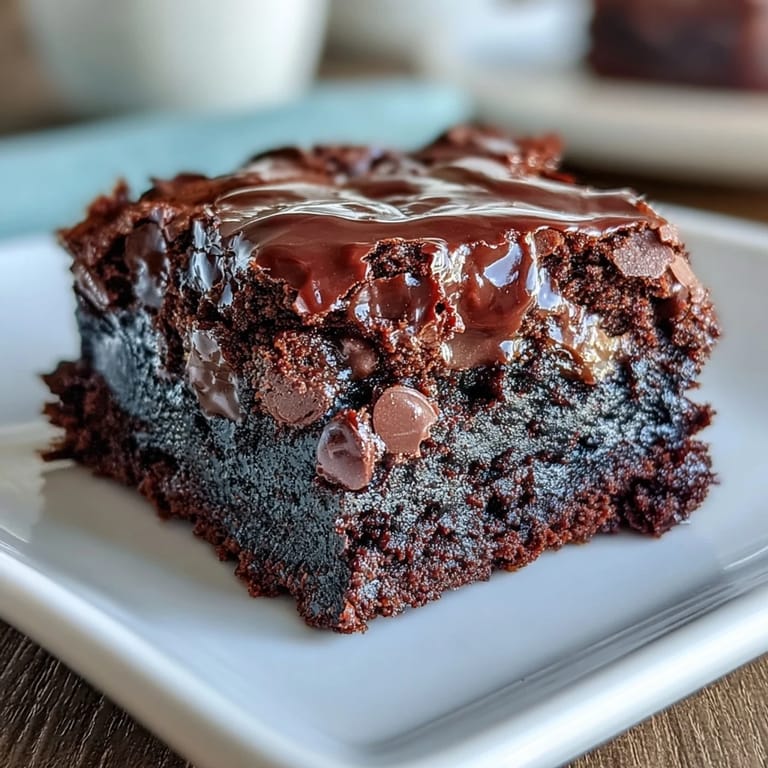 Save to Pinterest
 These peanut butter cup brownies have become the dessert I reach for when I want to feel like I've done something special without actually breaking a sweat. That's the real magic right there.
Recipe Help Center
- → What type of chocolate works best in these brownies?
Semi-sweet chocolate chips create a balanced sweetness that complements the peanut butter cups well.
- → Can I use crunchy peanut butter cups instead of mini ones?
Yes, standard-sized peanut butter cups halved can be used to maintain the layered texture.
- → How do I ensure the brownies stay fudgy?
Do not overmix the batter and avoid overbaking. Check with a toothpick for slightly moist crumbs.
- → Is it possible to add toppings after baking?
Melted chocolate or peanut butter drizzled over cooled brownies adds richness and visual appeal.
- → Can these be served warm?
Serving the brownies warm, especially with a scoop of vanilla ice cream, enhances their indulgent flavors.