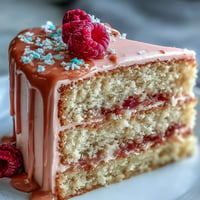
 Save to Pinterest
 The first time I made a King Cake, I was standing in my kitchen at 6 AM on Fat Tuesday, flour dusting my apron and a vague sense of panic creeping in—I'd committed to bringing one to a party and had no idea what I was doing. My grandmother had mentioned it once over the phone, something about braiding and lemon, and somehow that half-remembered conversation became my only guide. What emerged from my oven hours later wasn't perfect, but it was golden, fragrant with citrus, and unmistakably festive, and that's when I realized this bread wasn't about precision—it was about showing up with joy.
I still think about the year my teenage neighbor watched me braid this and asked if she could try the next batch—now she makes it for her college roommates every Mardi Gras. That moment taught me that recipes aren't just instructions; they're invitations to pass something meaningful forward, even if it's just the courage to attempt something that looks fancier than it actually is.
Ingredients
- All-purpose flour (4 cups): This is your foundation; it needs to develop gluten through kneading so the dough becomes elastic and can hold the beautiful braid shape without tearing.
- Active dry yeast (2 1/4 tsp): Room temperature ingredients matter here because they help the yeast activate evenly, so don't skip warming your milk and water.
- Whole milk and warm water (1/2 cup each): The combination creates a tender crumb; milk adds richness while water helps with rise and structure.
- Granulated sugar (1/2 cup for dough): This feeds the yeast and adds subtle sweetness without making the bread cake-like, which is the delicate balance this recipe needs.
- Unsalted butter, melted (1/4 cup): Melted rather than softened keeps the dough from getting too dense, and it creates that signature tender, slightly rich texture.
- Eggs, room temperature (2 large): Cold eggs can shock the dough and prevent proper mixing, so pull them out of the fridge about 20 minutes before you start.
- Cream cheese, softened (8 oz): This must be truly soft or you'll have lumps in your filling and struggle to spread it evenly down that center third.
- Fresh lemon juice and zest (2 tbsp juice, 1 tsp zest): Fresh is non-negotiable here; bottled juice tastes metallic and you'll taste the difference immediately once you bite into warm bread.
- Egg yolk (1 for filling): This adds richness to the filling without introducing too much liquid, which would make the dough soggy.
- Powdered sugar (1 1/2 cups): For the glaze; sift it if you have a sifter because lumps will show in your final presentation.
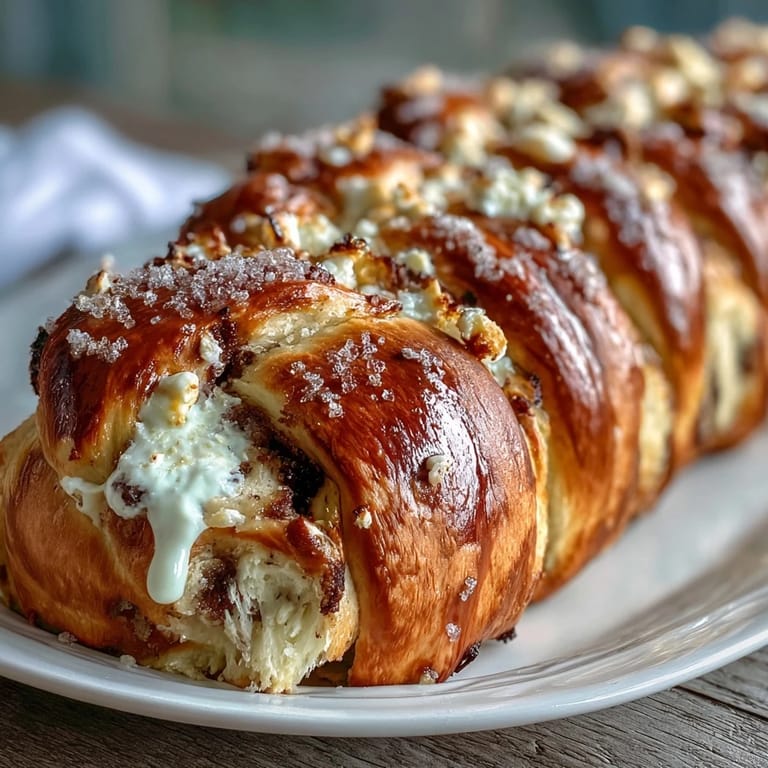
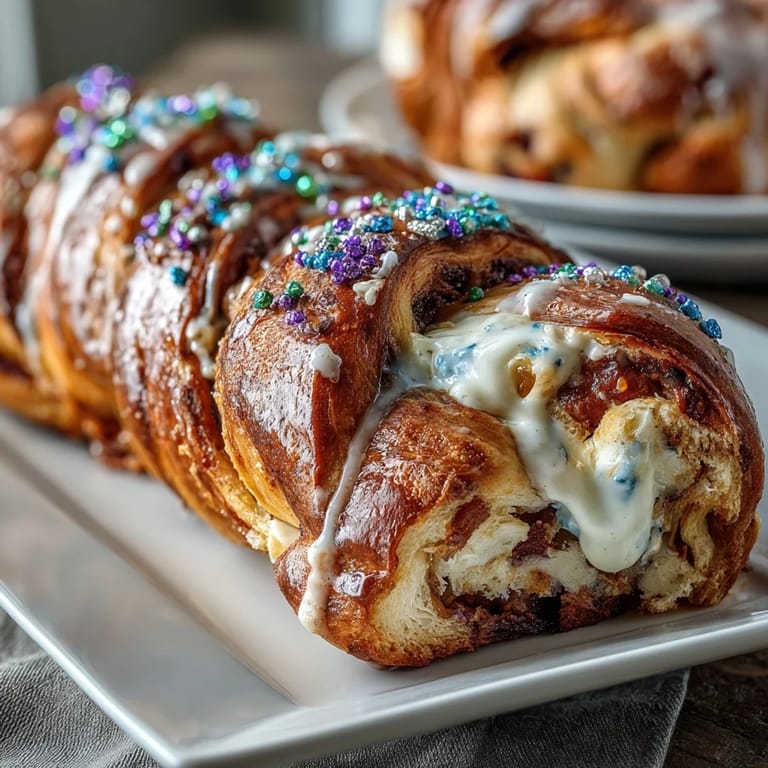
- Colored sanding sugar (purple, green, gold): This is where the celebration lives visually, so don't skimp—three distinct stripes look so much more intentional than a scattered approach.
Tired of Takeout? 🥡
Get 10 meals you can make faster than delivery arrives. Seriously.
One email. No spam. Unsubscribe anytime.
Instructions
- Wake up your yeast:
- Combine the warm water, milk, and yeast in a large bowl and let it sit for about 5 minutes—you're looking for a foamy, slightly bubbly surface that smells alive and bready. If nothing happens after 5 minutes, your yeast is dead and you'll need to start over with fresh yeast.
- Build your dough:
- Add the sugar, room temperature eggs, melted butter, and salt to your yeast mixture, then mix everything together until it's well combined. Gradually add the flour a little at a time, stirring with a wooden spoon or your hands until a shaggy dough forms that pulls away from the bowl sides.
- Knead until silky:
- Turn the dough onto a lightly floured surface and knead for 8–10 minutes, using the heel of your hand to push forward and your fingers to fold it back toward you in a rhythmic motion. You'll feel the transformation under your hands—it starts sticky and rough, then gradually becomes smooth and elastic, almost alive.
- First rise—the patience part:
- Place your dough in a greased bowl, cover it with a clean towel or plastic wrap, and let it rise in a warm spot for about 1½ hours until it's roughly doubled in size. I like to put mine near a sunny window or on top of the warm oven if it's on; sometimes I check it every 20 minutes just because it's satisfying to watch it grow.
- Make your filling while you wait:
- Beat the softened cream cheese until it's completely smooth, then add the sugar, fresh lemon juice, zest, and egg yolk, mixing until everything is pale, creamy, and well blended. The egg yolk makes it silkier than you'd expect; taste it and adjust the lemon if you want more zing.
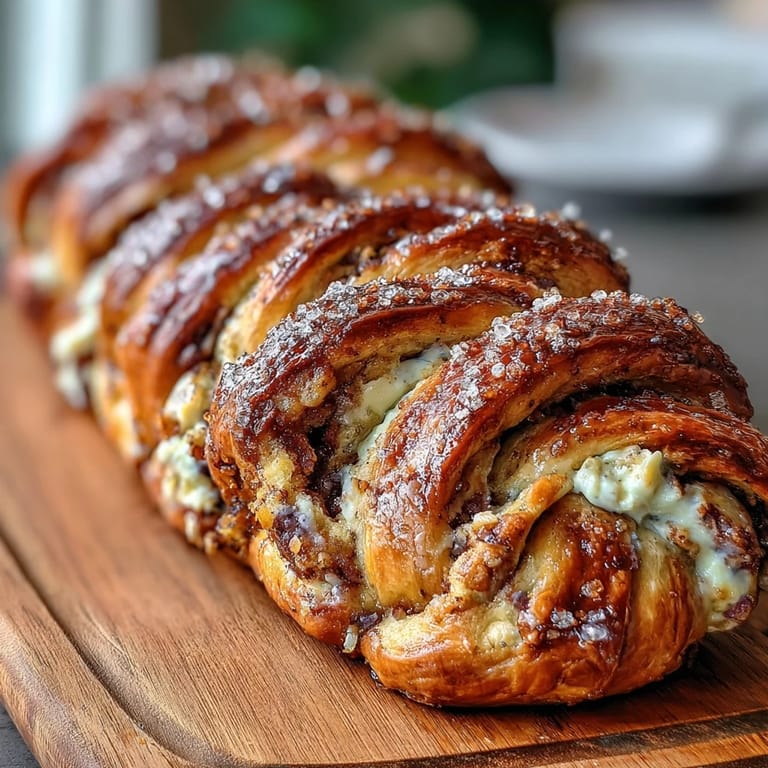
- Shape your masterpiece:
- Once the dough has risen, punch it down gently (it's fun but also calming), turn it onto your floured surface, and roll it into a rough 10x18-inch rectangle about 1/4-inch thick. If it keeps shrinking back, let it rest for 5 minutes—the gluten is tired and needs a break.
- Fill the center:
- Spread your lemon cream cheese filling lengthwise down the center third of the dough, staying about 1 inch away from the top and bottom edges. Use an offset spatula or the back of a spoon to make it even, but don't stress if it's a little rustic.
- Cut your strips:
- Using a sharp knife, cut diagonal strips about 1 inch wide along both long sides of the filling, leaving the center third (with the filling) and about 2 inches at each end untouched. The cuts should look like a ladder on each side; this is the part that feels like you're creating something, so take your time and enjoy it.
- Braid like you mean it:
- Starting at one end, fold a strip from the left over the filling, then one from the right, alternating sides to create a woven braid down the length of the dough. It doesn't have to be perfect—rustic is charming, and the slightly crooked braids have character.
- Seal the ends:
- Tuck the long ends under themselves to seal them and create a neat package; this keeps the filling from leaking out during the second rise and bake.
- Second rise:
- Transfer your braided beauty to a parchment-lined baking sheet, cover it loosely with a towel, and let it rise for about 45 minutes—it won't quite double again, but you'll see visible puffiness. This is the moment to preheat your oven to 350°F.
- Egg wash and bake:
- Whisk together 1 egg and 1 tablespoon of milk, then brush it all over your braid with a pastry brush for that gorgeous golden shine. Bake for 28–32 minutes until the top is deep golden brown and a skewer inserted into the bread (not the filling) comes out clean.
- Cool with patience:
- Move the braid to a wire rack and let it cool for at least 15 minutes before glazing—this lets the structure set so the glaze soaks in slightly rather than sliding right off. I know you want to eat it immediately; I do too.
- Glaze and dazzle:
- Whisk your powdered sugar with lemon juice or milk until you have a thick but pourable glaze (thicker than you think, because it needs to hold shape on the braid). Drizzle it over the cooled braid in whatever pattern feels right.
- Rainbow finish:
- Before the glaze sets completely, sprinkle your colored sugars in alternating stripes—purple, green, gold, purple again—and press them gently so they stick. This is the moment it transforms from beautiful bread into celebration on a plate.
 Save to Pinterest
 The best moment came when my mother-in-law asked me for the recipe after tasting a slice, and I realized I'd created something that mattered to her—not because it was complicated, but because it showed I'd spent my time thinking about making her happy. That's when this King Cake stopped being about technique and became about love made visible.
The Secret of the Braid
The braid isn't actually as difficult as it looks, but the beauty of it is that slight imperfection doesn't ruin anything—it actually adds character. What matters is making sure your cuts are even and that you alternate consistently; the dough is forgiving, and once you've folded three or four strips, your hands understand the rhythm and your brain stops overthinking it.
Why Fresh Lemon Changes Everything
The first time I made this with bottled lemon juice out of convenience, the filling tasted one-dimensional and almost chemical, and I couldn't figure out why. Fresh lemon juice has this brightness and complexity that bottled juice simply can't match, and in a recipe where lemon is a starring ingredient rather than a supporting note, it makes the difference between forgettable and unforgettable.
Making It Your Own
Once you've made this once and felt confident with the technique, you own it—and that means you can play with it. Some years I add a touch of cardamom to the dough, other times I swap the lemon zest for orange zest in the filling, and once I drizzled the whole thing with white chocolate because I was feeling fancy.
- Hide a small plastic baby or whole almond inside the baked braid after it cools—it's tradition, and whoever finds it is supposed to have good luck (and buy the next coffee or pastry).
- This bread actually tastes even better the next day—store it in an airtight container and the flavors deepen while the texture stays soft.
- If you're serving people with allergies, make sure to check every ingredient label because wheat, dairy, and eggs are all present here.
 Save to Pinterest
 Make this King Cake when you want to celebrate, when someone needs cheering up, or when you just want to know what it feels like to create something beautiful with your own hands. It's festive without being intimidating, impressive without requiring special skills—just time, attention, and the willingness to braid.
Recipe Help Center
- → How do I achieve a soft and elastic dough?
Use warm liquids to activate yeast, and knead the dough for 8–10 minutes until smooth and elastic. Proper rising time also helps develop softness.
- → Can I enhance the lemon flavor in the filling?
Yes, increasing lemon zest or fresh lemon juice in the cream cheese filling will intensify the citrus notes.
- → What is the purpose of the egg wash?
Brushing the braid with egg wash creates a shiny golden crust and helps toppings adhere during baking.
- → How should the braid be shaped for even baking?
Cut diagonal strips along both sides of the filling and fold alternately over the center to create a neat braid, sealing the ends to keep filling contained.
- → What alternatives can be used for the glaze?
Mix powdered sugar with either lemon juice or milk to form a thick glaze that complements the flavors and adds sweetness.